class09
From the Duckett HTML book and the Duckett JS book:
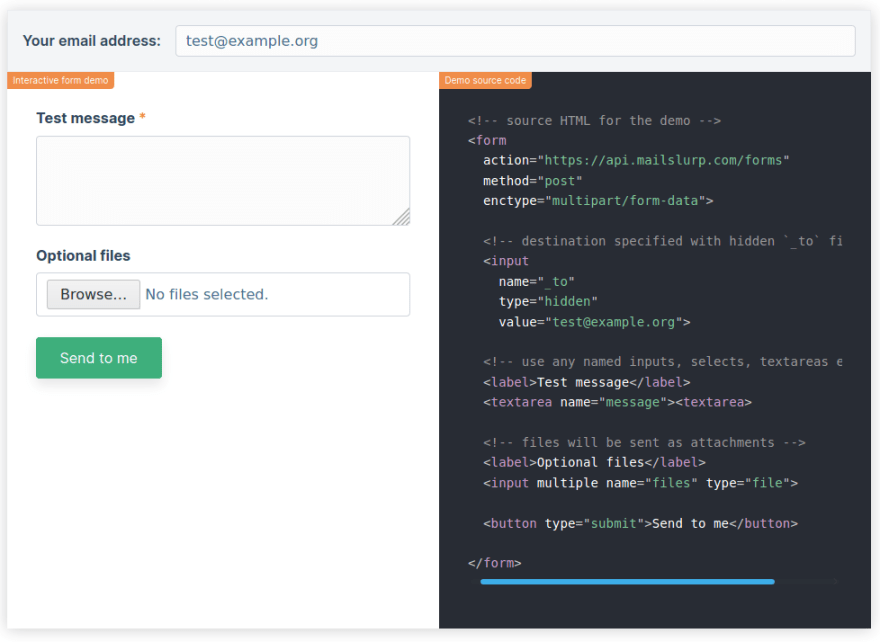
Forms
The best known form on the web is probably the search box that sits right in the middle of Google’s homepage
Form Controls
There are several types of form controls that you can use to collect information from visitors to your site.
- ADDING TEXT:
- Text input (single-line) Used for a single line of text such as email addresses and names.
- Password input Like a single line text box but it masks the characters entered.
- Text area (multi-line) For longer areas of text, such as messages and comments.
- Making Choices: Radio buttons For use when a user must select one of a number of options.
- Checkboxes When a user can select and unselect one or more options.
- Drop-down boxes When a user must pick one of a number of options from a list.
- Submitting Forms: Submit buttons To submit data from your form to another web page.
- Image buttons Similar to submit buttons but they allow you to use an image.
-
Uploading Files: File upload Allows users to upload files (e.g. images) to a website
- How Forms Work : A user fills in a form and then presses a button to submit the information to the server.
Multiple Select Box:
You can turn a drop down select box into a box that shows more than one option by adding the size attribute. Its value should be the number of options you want to show at once
Button & hidden Controls
The element was introduced to allow users more control over how their buttons appear, and to allow other elements to appear inside the button
- type=”hidden”
Form Structure
Form controls live inside a element. This element should always carry the action attribute and will usually have a method and id attribute too. action Every element requires an action attribute. Its value is the URL for the page on the server that will receive the information in the form when it is submitted. method Forms can be sent using one of two methods: get or post. With the get method, the values from the form are added to the end of the URL specified in the action attribute.
Labelling Form Controls:
When introducing form controls, the code was kept simple by indicating the purpose of each one in text next to it. However, each form control should have its own label element as this makes the form accessible to vision-impaired users
Grouping Form Elements
You can group related form controls together inside the element. This is particularly helpful for longer forms. You can group related form controls together inside the fieldset element. This is particularly helpful for longer forms.
- The legend element can come directly after the opening fieldset tag and contains a caption which helps identify the purpose of that group of form controls.
-
Each form control is given a name, and the text the user types in or the values of the options they select are sent to the server
- HTML5 introduces new form elements which make it easier for visitors to fill in forms.
- HTML5: Date Input
- HTML5: Email & URL Input
- HTML5: Search Input
Lists, Tables and Forms

- Bullet Point Styles
- The list-style-type property allows you to control the shape or style of a bullet point (also known as a marker). It can be used on rules that apply to the ol, ul, and li elements.
Images for Bullets:
You can specify an image to act as a bullet point using thelist-style-image property.The value starts with the letters url and is followed by a pair of parentheses. Inside the parentheses, the path to the image is given inside double quotes.This property can be used on rules that apply to the ul and li elements
Positioning the Marker:
Lists are indented into the page by default and the list-styleposition property indicates whether the marker should appear on the inside or the outside of the box containing the main points.
List Shorthand:
As with several of the other CSS properties, there is a property that acts as a shorthand for list styles. It is called list-style, and it allows you to express the markers’ style, image and position properties in any order.
Table Properties:
You have already met several properties that are commonly used with tables. Here we will put them together in a single example using the following
- width to set the width of the table
- padding to set the space between the border of each table cell and its content
- text-transform to convert the content of the table headers to uppercase
- letter-spacing, font-size to add additional styling to the content of the table headers
- border-top, border-bottom to set borders above and below the table headers
- text-align to align the writing to the left of some table cells and to the right of the others
- background-color to change the background color of the alternating table rows
- :hover to highlight a table row when a user’s mouse goes over it
Border on Empty Cells
If you have empty cells in your table, then you can use the empty-cells property to specify whether or not their borders should be shown. Since browsers treat empty cells in different ways, if you want to explicitly show or hide borders on any empty cells then you should use this property. It can take one of three values:
- show This shows the borders of any empty cells.
- hide This hides the borders of any empty cells.
- inherit If you have one table nested inside another, the inherit value instructs the table cells to obey the rules of the containing table.
Styling Forms:
CSS is commonly used to control the appearance of form elements. This is both to make them more attractive and to make them more consistent across different browsers It is most common to style:
- Text inputs and text areas
- Submit buttons
- Labels on forms, to get the form controls to align nicely
Cursor Styles:
The cursor property allows you to control the type of mouse cursor that should be displayed to users. For example, on a form you might set the cursor to be a hand when the user hovers over it. Here are the most commonly used values for this property:
- auto
- crosshair
- default
- pointer
- move
- text
- wait
- help
- url(“cursor.gif”)
Events
- DIFFERENT EVENT TYPES:
- FOCUS EVENTS
- FORM EVENTS
- MUTATION EVENTS

HOW EVENTS TRIGGER JAVASCRIPT CODE
When the user interacts with the HTML on a web page, there are three steps involved in getting it to trigger some JavaScript code. Together these steps are known as event handling.
- Select t he element node(s) you want the script to respond to.
- Indicate which event on the selected node(s) will trigger the response.
- State the code you want to run when the event occurs.
TRADITIONAL DOM EVENT HANDLERS
All modern browsers understand this way of creating an event handler, but you can only attach one function to each event handler.
EVENT LISTENERS
Event listeners are a more recent approach to handling events. They can deal with more than one function at a time but they are not supported in older browsers.
USING PARAMETERS WITH EVENT HANDLERS & LISTENERS
Because you cannot have parentheses after the function names in event handlers or listeners, passing arguments requires a workaround.
THE EVENT OBJECT
When an event occurs, the event object tells you information about the event, and the element it happened upon.
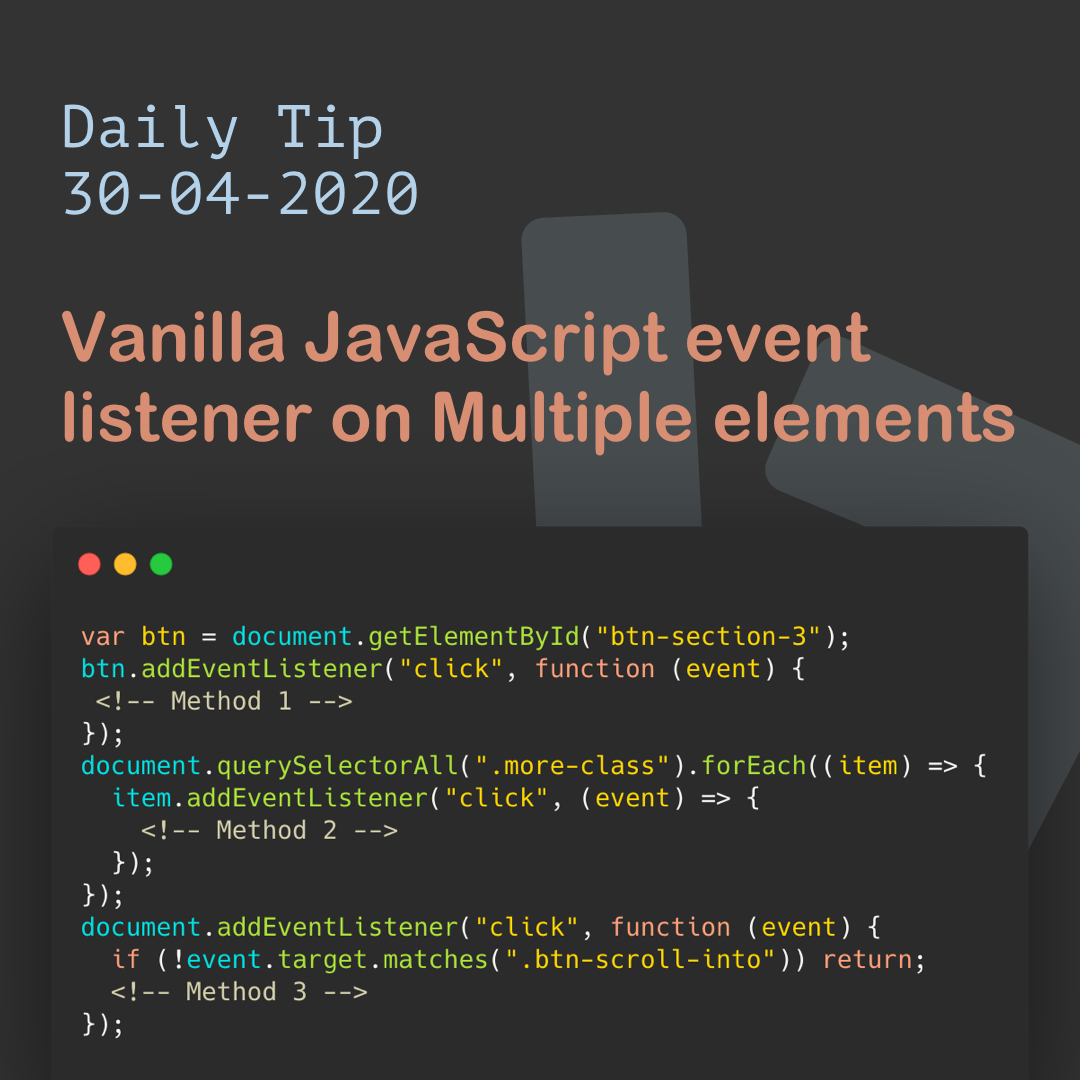
EVENT DELEGATION
Creating event listeners for a lot of elements can slow down a page, but event flow allows you to listen for an event on a parent element.
CHANGING DEFAULT BEHAVIOR
The event object has methods that change: the default behavior of an element and how the element’s ancestors respond to the event.
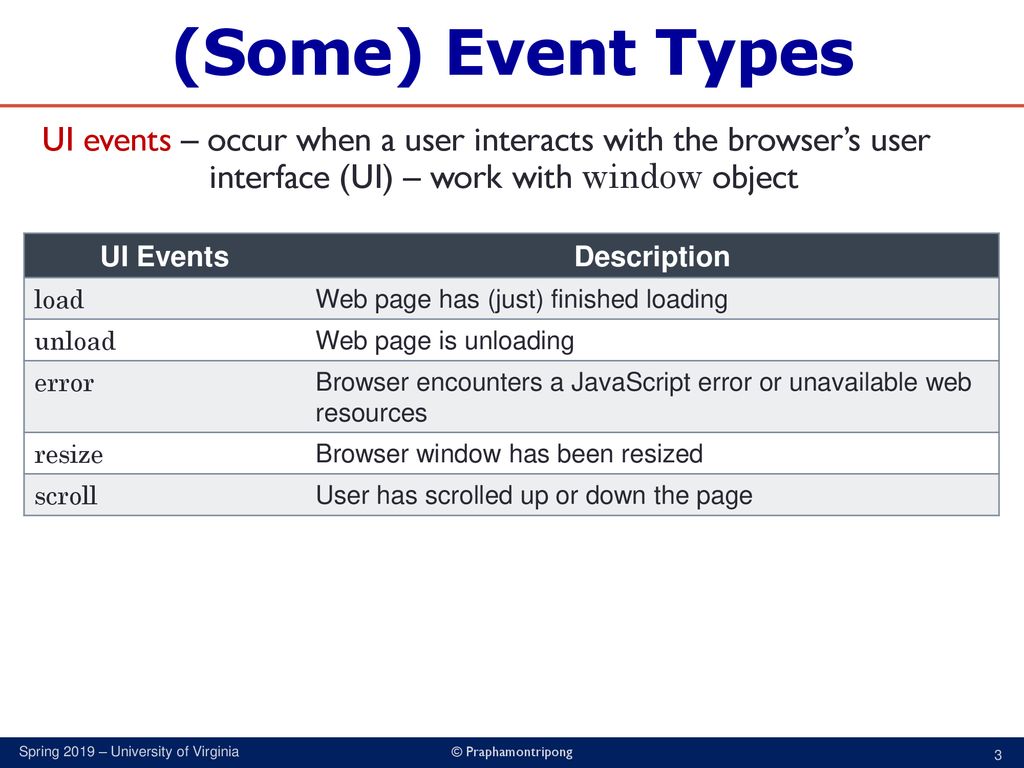
USER INTERFACE EVENTS
User interface CUI) events occur as a result of interaction with the browser window rather than the HTML page contained within it, e.g., a page having loaded or the browser window being resized.
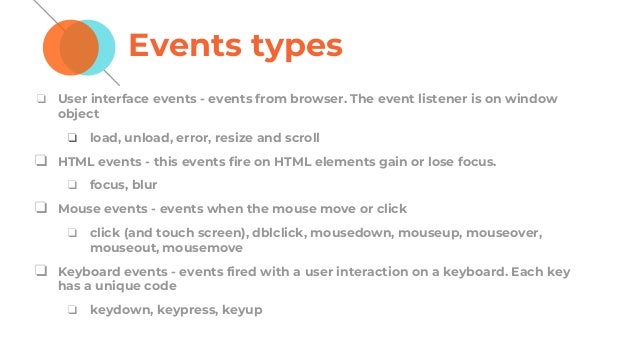
FOCUS & BLUR EVENTS
The HTML elements you can interact with, such as links and form elements, can gain focus. These events fire when they gain or lose focus.
MOUSE EVENTS
The mouse events are fired when the mouse is moved and also when its buttons are clicked.
KEYBOARD EVENTS
The keyboard events are fired when a user interacts with the keyboard (they fire on any kind of device with a keyboard).
Events are the browser’s way of indicating when something has happened (such as when a page has finished loading or a button has been clicked). Binding is the process of stating which event you are waiting to happen, and which element you are waiting for that event to happen upon. When an event occurs on an element, it can trigger a JavaScript function. When this function then changes the web page in some way, it feels interactive because it has responded to the user. You can use event delegation to monitor for events that happen on all of the children of an element. The most commonly used events are W3C DOM events, although there are others in the HTMLS specification as well as browser-specific events.